So, you’ve just had an epic surf session, carving through some sweet waves. But then, disaster strikes. You notice a crack, a chip, a dreaded ding on your beloved surfboard. Don’t panic! Before you rush to a professional repair shop and shell out big bucks, consider the power of the Surfboard Glassing Kit.
This comprehensive guide will walk you through the ins and outs of DIY ding repair, empowering you to get back in the water faster and with money still in your pocket.
At Surf Shop Cabo, we understand the bond between a surfer and their board. A ding, no matter how small, can compromise your board’s performance and even lead to water damage, ultimately shortening its lifespan.
That’s why having a reliable Surfboard Glassing Kit on hand is essential for every surfer. It’s your first line of defense against the inevitable bumps and bruises that come with the thrill of riding the waves.
This guide will demystify the process of using a Surfboard Glassing Kit, breaking it down into easy-to-follow steps. We’ll cover everything from assessing the damage and preparing your board to the proper techniques for applying resin and achieving a smooth, professional-looking finish. You’ll discover that with the right tools and a little patience, DIY ding repair is well within your reach.
Investing in a quality Surfboard Glassing Kit isn’t just about saving money; it’s about taking ownership of your equipment and understanding its construction. Knowing how to perform basic repairs will not only keep your board in top condition but also deepen your connection to the surfing experience. Let’s dive in and unlock the secrets of successful DIY ding repair.
Understanding Your Surfboard Glassing Kit
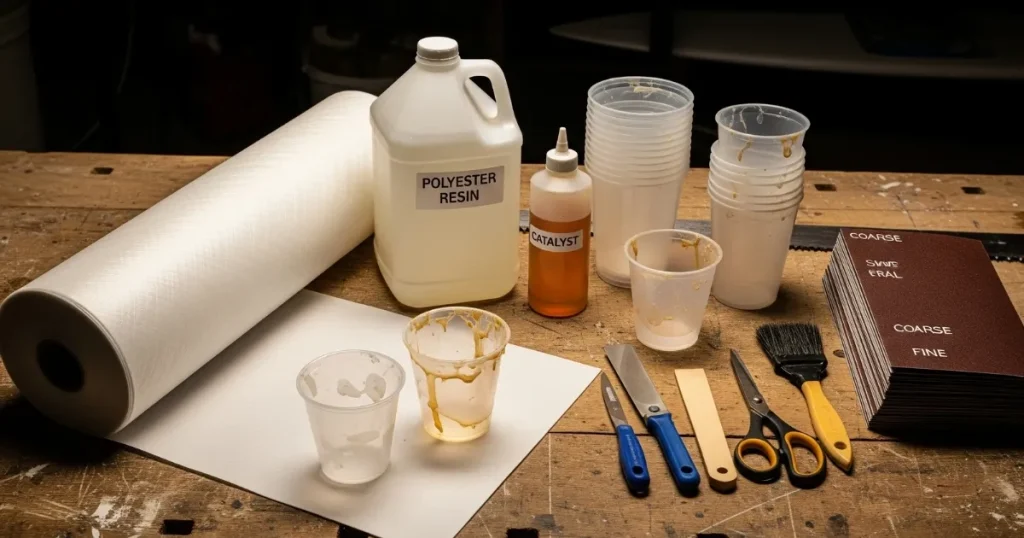
A standard Surfboard Glassing Kit typically includes several key components. These are specifically designed to work together to create a strong, waterproof, and seamless repair on your surfboard. Familiarizing yourself with each item is the first step towards a successful DIY ding repair. Knowing what each component does will make the entire process much smoother.
The core of any Surfboard Glassing Kit is the resin. This is a viscous liquid that, when mixed with a catalyst (hardener), undergoes a chemical reaction to solidify into a hard, durable material. Different types of resin are available, such as polyester and epoxy, and it’s crucial to choose the correct type for your board’s construction. Most fiberglass surfboards use polyester resin, while epoxy boards require epoxy resin.
Fiberglass cloth is another essential component found in most Surfboard Glassing Kits. This woven material provides structural strength to the repair, reinforcing the resin and ensuring a long-lasting fix. The weight and weave of the fiberglass cloth can vary, and the appropriate type will depend on the size and nature of the ding. Smaller dings might only require resin, while larger, more structural damage will benefit from fiberglass reinforcement.
Finally, your Surfboard Glassing Kit will likely include a catalyst (hardener), mixing cups and sticks, sandpaper of various grits for finishing, and often other helpful tools like Q-cells (a lightweight filler for larger dings), razor blades, and masking tape. Understanding the purpose of each of these items is vital for achieving a professional-quality repair.
Assessing the Ding and Gathering Your Tools
Before you even think about opening your Surfboard Glassing Kit, the first crucial step is to thoroughly assess the damage. Carefully examine the ding to determine its size, depth, and location on your surfboard. Is it a small surface crack, a deeper puncture, or a significant impact that has damaged the foam core? Understanding the extent of the damage will dictate the repair approach.
Once you’ve assessed the ding, gather all the necessary components from your Surfboard Glassing Kit and any additional tools you might need. This includes your chosen resin and catalyst, fiberglass cloth (if required), mixing cups and sticks, sandpaper (various grits from rough to fine), a clean cloth, rubbing alcohol or acetone for cleaning, and potentially masking tape and a razor blade. Having everything laid out and within easy reach will streamline the repair process.
Ensure you are working in a well-ventilated area, as the fumes from surfboard resin can be strong. It’s also a good idea to protect your workspace with some newspaper or a drop cloth. Proper preparation is key to a successful DIY ding repair. Taking the time to organize your tools and prepare your workspace will prevent unnecessary delays and ensure a cleaner, more efficient repair process.
Remember to wear gloves and eye protection when working with resin and catalyst, as these chemicals can irritate your skin and eyes. Safety should always be your top priority when undertaking any how to repair a surfboard project. With your ding assessed and your tools gathered, you’re now ready to move on to the next stage of the repair process.
Step-by-Step Guide to DIY Ding Repair
The first hands-on step in using your Surfboard Glassing Kit is to thoroughly clean and prepare the damaged area. Use rubbing alcohol or acetone and a clean cloth to remove any dirt, wax, salt, or debris from around the ding. A clean surface is essential for the resin to properly adhere to your surfboard. For larger cracks, you may need to carefully open them slightly with a clean, sharp object to ensure thorough cleaning.
Next, if the ding has penetrated the foam core, it’s crucial to dry it out completely before proceeding with the repair. You can place your board in a warm, dry environment for several hours or even use a hairdryer on a low heat setting (being careful not to overheat the foam). For deeper dings, you might consider using Q-cells or a similar lightweight filler mixed with resin to fill the void before applying fiberglass and resin layers. This will help restore the board’s original shape and strength.
Now it’s time to prepare your resin mixture. Carefully follow the instructions provided with your surfboard resin kit regarding the correct ratio of resin to catalyst. Adding too much or too little catalyst can result in a weak or improperly cured repair. Mix the resin and catalyst thoroughly but gently, avoiding the creation of excessive air bubbles. Work in small batches, especially if you’re new to DIY ding repair, as the resin will eventually start to harden.
If your ding requires fiberglass reinforcement, cut a piece of fiberglass cloth slightly larger than the damaged area. Lay the cloth over the ding and carefully apply the mixed resin using a brush or a mixing stick. Ensure the fiberglass is fully saturated with resin, working out any air bubbles. For smaller dings that don’t require fiberglass, carefully apply a sufficient amount of resin to fill the damaged area and slightly overlap the surrounding undamaged surface. Allow the resin to cure completely according to the manufacturer’s instructions. This may take several hours.
Sanding and Finishing Your Repair
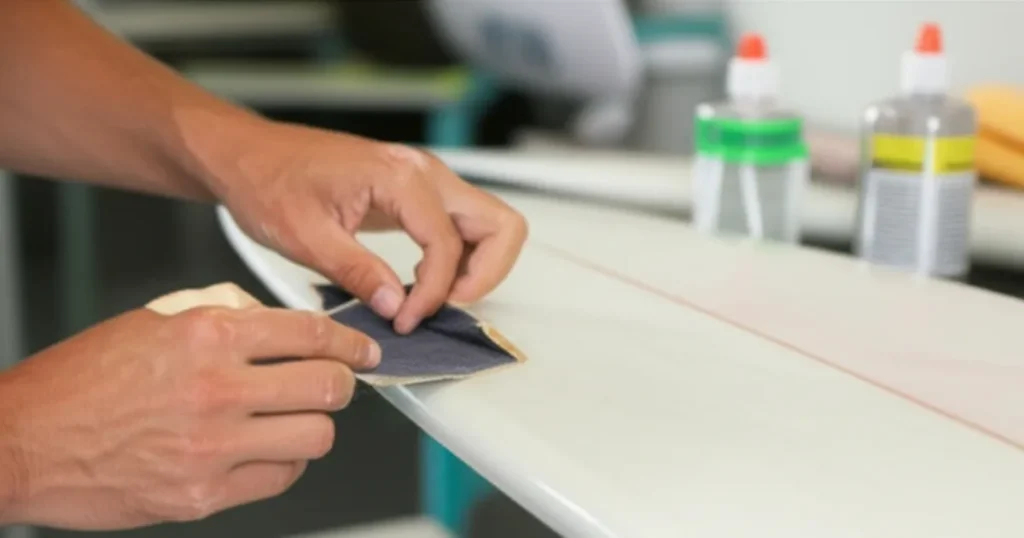
Once the resin has fully cured and is hard to the touch, it’s time to sand down the repair to achieve a smooth and even finish. Start with a coarser grit sandpaper (around 80-120 grit) to remove any excess resin and level the repair with the surrounding surface of your surfboard. Be careful not to sand too aggressively, as you could damage the surrounding undamaged area.
As you progress, gradually move to finer grit sandpapers (around 220-400 grit) to further smooth out the repair. The goal is to create a seamless transition between the repaired area and the original finish of your board. For a truly professional look, you can finish with an even finer grit sandpaper (around 600 grit or higher) and even consider using a rubbing compound to restore the shine.
Take your time during the sanding process. This is where you refine your DIY ding repair and ensure it’s not only structurally sound but also aesthetically pleasing. Regularly wipe away sanding dust with a clean cloth to check your progress and identify any uneven areas that need further attention. A well-sanded repair will also contribute to the hydrodynamics of your surfboard.
Finally, once you are satisfied with the smoothness and appearance of your repair, give the area a final wipe down with a clean cloth. Congratulations! You’ve successfully used your Surfboard Glassing Kit to repair your ding and saved yourself a trip to the repair shop. Now, with your board as good as new, it’s time to head back to Surf Shop Cabo and tell us about your successful how to repair a surfboard adventure before hitting the waves once more. Remember, practice makes perfect, and each successful surfboard ding kit repair will build your confidence and skills.